(→Slot 2) |
No edit summary |
||
| (32 intermediate revisions by 23 users not shown) | |||
| Line 2: | Line 2: | ||
== Overview == |
== Overview == |
||
| − | The booster system has changed slightly from [[Boosters (Uncharted 2: Among Thieves)|the booster system]] in ''[[Uncharted 2: Among Thieves]]''. This time around, the effect of boosters will change with which rank the booster is at. The more a booster is used, the more it will rank up. The higher its rank, the greater |
+ | The booster system has changed slightly from [[Boosters (Uncharted 2: Among Thieves)|the booster system]] in ''[[Uncharted 2: Among Thieves]]''. This time around, the effect of boosters will change with which rank the booster is at. The more a booster is used, the more it will rank up. The higher its rank, the greater its reward. For every booster there are three levels that can be unlocked through earning the corresponding medals that go along with it. |
| − | |||
== List of boosters == |
== List of boosters == |
||
| + | ===Competitive=== |
||
| − | This is an early list of boosters that were available in an early press event held by [[Naughty Dog]] when they premiered the multiplayer mode. Booster names and effects are subject to change. The boosters in italics are the ones confirmed for the June/July beta. Although several boosters listed below refer to a "radar," Naughty Dog have confirmed that there is no radar in Uncharted 3. |
||
| + | ====Slot 1==== |
||
| − | |||
| + | {|class="wikitable" |
||
| − | ==Competitive == |
||
| + | !Booster |
||
| − | === Slot 1=== |
||
| + | !Effects |
||
| − | *'''Come Here''' |
||
| + | !Upgrade |
||
| − | **''''''Level 1 - See the enemy that killed you if they're within a short distance until they die. |
||
| + | ![[Uncharted 3: Drake's Deception multiplayer ranks|Rank]] |
||
| − | **Level 2 - The distance you can see your opponent is increased |
||
| + | |- |
||
| − | **Level 3 - The distance you can see your opponent is increased significantly |
||
| + | |style="text-align:center;" rowspan="3"|[[Come Here]]<center>[[File:Bch.png|75px]]</center> |
||
| − | *'''Endurance''' |
||
| + | |Level 1 - See the enemy that killed you if they're within a short distance until they die |
||
| − | **Level 1 - Decrease sprint recovery time |
||
| + | |style="text-align:center;" rowspan="3"|[[Retaliation]] |
||
| − | **Level 2 - The effects of Level 1 with increased sprint duration |
||
| + | |style="text-align:center;" rowspan="3"|1 |
||
| − | **Level 3 - Sprint recovery time is decreased further |
||
| + | |- |
||
| − | *'''Beast Mode''' |
||
| + | |Level 2 - The distance you can see your opponent is increased |
||
| − | **Level 1 - Move faster with heavy objects |
||
| + | |- |
||
| − | **Level 2 - The speed you move with heavy objects is increased |
||
| − | + | |Level 3 - The distance you can see your opponent is increased significantly |
|
| + | |- |
||
| − | *'''Let Me See''' |
||
| + | |style="text-align:center;" rowspan="3"|[[Endurance]]<center>[[File:Endurance.png|75px]]</center> |
||
| − | **Level 1 - After two or more deaths with no kills you see all opponents for a short time |
||
| + | |Level 1 - Decrease sprint recovery time |
||
| − | **Level 2 - The duration for which you see opponents is increased |
||
| + | |style="text-align:center;" rowspan="3"|[[Sunday Stroll]]/[[Marathon Runner]] |
||
| − | **Level 3 - The duration for which you see opponents is increased significantly |
||
| + | |style="text-align:center;" rowspan="3"|1 |
||
| − | *'''Scoped In''' |
||
| + | |- |
||
| − | **Level 1 - Reduced pain wobble while scoped in |
||
| − | + | |Level 2 - The effects of Level 1 with increased sprint duration |
|
| + | |- |
||
| − | **Level 3 - No pain wobble while scoped in |
||
| + | |Level 3 - Sprint recovery time is decreased further |
||
| − | **UNLOCKED: Level 9. |
||
| + | |- |
||
| − | *'''Cloaked''' |
||
| + | |style="text-align:center;" rowspan="3"|[[Beast Mode (Uncharted 3: Drake's Deception)|Beast Mode]]<center>[[File:Bbm.png|75px]]</center> |
||
| − | **Level 1 - Opponents will not see your player arrow and you are difficult to hear |
||
| − | + | |Level 1 - Move faster with heavy objects |
|
| + | |style="text-align:center;" rowspan="3"|[[Captured]] |
||
| − | **Level 3 - You make no sound while moving and also become immune to [[Disruption]] |
||
| + | |style="text-align:center;" rowspan="3"|6 |
||
| − | **UNLOCKED: Level 9 |
||
| + | |- |
||
| − | *'''Regeneration''' |
||
| + | |Level 2 - The speed you move with heavy objects is increased |
||
| − | **Level 1 - Recover from wounds faster |
||
| + | |- |
||
| − | **Level 2 - Recovery speed is increased |
||
| − | + | |Level 3 - The speed you move with heavy objects is increased significantly |
|
| + | |- |
||
| − | **UNLOCKED: Level 15. |
||
| + | |style="text-align:center;" rowspan="3"|[[Let Me See]]<center>[[File:Blms.png|75px]]</center> |
||
| − | *'''Fleet Foot''' |
||
| + | |Level 1 - After two or more deaths with no kills you see all opponents for a short time |
||
| − | **Level 1 - Move faster while aiming |
||
| + | |style="text-align:center;" rowspan="3"|[[Avenger]] |
||
| − | **Level 2 - The speed you move while aiming is increased |
||
| + | |style="text-align:center;" rowspan="3"|6 |
||
| − | **Level 3 - The speed you move while aiming is increased significantly |
||
| + | |- |
||
| − | **UNLOCKED: Level 15. |
||
| + | |Level 2 - The duration for which you see opponents is increased |
||
| − | *'''Explosive Shell Expert''' |
||
| + | |- |
||
| − | **Level 1 - Any [[M32-Hammer]] you use comes with one extra round. |
||
| − | + | |Level 3 - The duration for which you see opponents is increased significantly |
|
| + | |- |
||
| − | **Level 3 - The amount of additional [[M32-Hammer]] ammo increased to 2. |
||
| + | |style="text-align:center;" rowspan="3"|[[Scoped In (Uncharted 3: Drake's Deception)|Scoped In]]<center>[[File:Bsi.png|75px]]</center> |
||
| − | **UNLOCKED: Level 25. |
||
| + | |Level 1 - Reduced pain wobble while scoped in |
||
| − | *'''Explosive Expert''' |
||
| + | |style="text-align:center;" rowspan="3"|[[The Long Ranger]] |
||
| − | **Level 1 -'' ''Start every match with an additional grenade slot |
||
| + | |style="text-align:center;" rowspan="3"|10 |
||
| − | **Level 2 - The effects of Level 1 and spawn with an additional grenade when killed with one |
||
| + | |- |
||
| − | **Level 3 -''' '''Start every match with two extra grenade slots and spawn with an additional grenade when killed by one. |
||
| + | |Level 2 - Pain wobble is reduced further |
||
| − | **UNLOCKED: Level 35. |
||
| + | |- |
||
| − | *'''Weapon Expert''' |
||
| − | + | |Level 3 - No pain wobble while scoped in |
|
| + | |- |
||
| − | **Level 2 - Effects of Level 1 and Switching Between Sidearm and Long Gun is Faster |
||
| + | |style="text-align:center;" rowspan="3"|[[Cloaked]]<center>[[Image:Cloaked.png|75px]]</center> |
||
| − | **Level 3 - Effects of Levels 1 and 2 as well as one additional MOD slot to long guns. |
||
| + | |Level 1 - Opponents will not see your player arrow and you are difficult to hear |
||
| − | **UNLOCKED: Level 45. |
||
| + | |style="text-align:center;" rowspan="3"|[[Assassin]] |
||
| − | *'''Sugar Buddy''' - Receive a quarter of the cash your buddy earns. Unlocked: Level 20. |
||
| + | |style="text-align:center;" rowspan="3"|10 |
||
| − | *'''Booty Buddy''' - Get rewards from chests when your buddy does. Unlocked: Level 30. |
||
| + | |- |
||
| − | *'''Thanks Buddy''' - Get a medal for every 3 your buddy earns. Unlocked: Level 40. |
||
| + | |Level 2 - You become even more difficult to hear. |
||
| + | |- |
||
| + | |Level 3 - You make no sound while moving and also become immune to [[Disruption]] |
||
| + | |- |
||
| + | |style="text-align:center;" rowspan="3"|[[Regeneration]]<center>[[File:Bregen.png|75px]]</center> |
||
| + | |Level 1 - Recover from wounds faster |
||
| + | |style="text-align:center;" rowspan="3"|[[Lucky...]] |
||
| + | |style="text-align:center;" rowspan="3"|15 |
||
| + | |- |
||
| + | |Level 2 - Recovery speed is increased |
||
| + | |- |
||
| + | |Level 3 - Recovery speed is increased significantly |
||
| + | |- |
||
| + | |style="text-align:center;" rowspan="3"|[[Fleet Foot (Uncharted 3: Drake's Deception)|Fleet Foot]]<center>[[File:Bff.png|75px]]</center> |
||
| + | |Level 1 - Move faster while aiming |
||
| + | |style="text-align:center;" rowspan="3"|[[Commando]] |
||
| + | |style="text-align:center;" rowspan="3"|15 |
||
| + | |- |
||
| + | |Level 2 - The speed you move while aiming is increased |
||
| + | |- |
||
| + | |Level 3 - The speed you move while aiming is increased significantly |
||
| + | |- |
||
| + | |style="text-align:center;" rowspan="3"|[[Explosive Shell Expert]]<center>[[File:Bese.png|75px]]</center> |
||
| + | |Level 1 - Any [[M32-Hammer]] you use comes with one extra round. |
||
| + | |style="text-align:center;" rowspan="3"|[[Fire In The Hole]] |
||
| + | |style="text-align:center;" rowspan="3"|25 |
||
| + | |- |
||
| + | |Level 2 - Any [[RPG-7 |RPG-7]] & [[M32-Hammer]] you use comes with one extra round. |
||
| + | |- |
||
| + | |Level 3 - The amount of additional [[M32-Hammer]] ammo increased to 2. |
||
| + | |- |
||
| + | |style="text-align:center;" rowspan="3"|[[Explosive Expert (Uncharted 3: Drake's Deception)|Explosive Expert]]<center>[[File:Bee.png|75px]]</center> |
||
| + | |Level 1 - Start every match with an additional grenade slot |
||
| + | |style="text-align:center;" rowspan="3"|[[Frag 'Em]] |
||
| + | |style="text-align:center;" rowspan="3"|35 |
||
| + | |- |
||
| + | |Level 2 - The effects of Level 1 and spawn with an additional grenade when killed with one |
||
| + | |- |
||
| + | |Level 3 - Start every match with two extra grenade slots and spawn with an additional grenade when killed by one. |
||
| + | |- |
||
| + | |style="text-align:center;" rowspan="3"|[[Weapon Expert]]<center>[[File:Weapon Expert.png|75px]]</center> |
||
| + | |Level 1 - Add one additional [[Weapon Mods|MOD]] slot to all pistols. |
||
| + | |style="text-align:center;" rowspan="3"|[[Gunslinger]]/[[Triple Threat]] |
||
| + | |style="text-align:center;" rowspan="3"|45 |
||
| + | |- |
||
| + | |Level 2 - Effects of Level 1 and switching between sidearm and long gun is Faster |
||
| + | |- |
||
| + | |Level 3 - Effects of Levels 1 and 2 as well as one additional [[Weapon Mods|MOD]] slot to long guns. |
||
| + | |- |
||
| + | |style="text-align:center;"|'''Sugar Buddy''' |
||
| + | |Receive a quarter of the cash your buddy earns |
||
| + | |style="text-align:center;"|N/A |
||
| + | |style="text-align:center;"|20 |
||
| + | |- |
||
| + | |style="text-align:center;"|'''Booty Buddy''' |
||
| + | |Get rewards from chests when your buddy does |
||
| + | |style="text-align:center;"|N/A |
||
| + | |style="text-align:center;"|30 |
||
| + | |- |
||
| + | |style="text-align:center;"|'''Thanks Buddy''' |
||
| + | |Get a medal for every 3 your buddy earns |
||
| + | |style="text-align:center;"|N/A |
||
| + | |style="text-align:center;"|40 |
||
| + | |- |
||
| + | |style="text-align:center;"|'''Out of Breath''' |
||
| + | |Sprint recovery time and duration is slower. 100% more cash per kill |
||
| + | |style="text-align:center;"|N/A |
||
| + | |style="text-align:center;"|Legacy 1 |
||
| + | |- |
||
| + | |style="text-align:center;"|'''Flat Footed''' |
||
| + | |Move significantly slower while aiming. 150% more cash per kill |
||
| + | |style="text-align:center;"|N/A |
||
| + | |style="text-align:center;"|Legacy 1 |
||
| + | |- |
||
| + | |style="text-align:center;"|'''Slow Healing''' |
||
| + | |Health regeneration is significantly slowed. 100% more cash per kill |
||
| + | |style="text-align:center;"|N/A |
||
| + | |style="text-align:center;"|Legacy 2 |
||
| + | |- |
||
| + | |style="text-align:center;"|'''Fewer Grenades''' |
||
| + | |Ability to carry grenades is reduced. 200% more cash per kill |
||
| + | |style="text-align:center;"|N/A |
||
| + | |style="text-align:center;"|Legacy 2 |
||
| + | |} |
||
| − | === |
+ | ====Slot 2==== |
| + | {|class="wikitable" |
||
| − | *'''Power Hunter''' |
||
| + | !Booster |
||
| − | **Level 1 - See the location of Power Weapons within a short distance |
||
| + | !Effects |
||
| − | **Level 2 - The distance you see Power Weapons is increased |
||
| + | !Upgrade |
||
| − | **Level 3 - The distance you see Power Weapons is increased significantly |
||
| + | ![[Uncharted 3: Drake's Deception multiplayer ranks|Rank]] |
||
| − | *'''Daredevil''' |
||
| + | |- |
||
| − | **Level 1 - Taunt over an opponents body to receive ammo. |
||
| + | |style="text-align:center;" rowspan="3"|[[Power Hunter]] |
||
| − | **Level 2 - Taunt over an opponents body to receive a grenade. |
||
| − | + | |Level 1 - See the location of Power Weapons within a short distance |
|
| + | |style="text-align:center;" rowspan="3"|[[Power Killer]] |
||
| − | *'''Kickback Endurance''' |
||
| + | |style="text-align:center;" rowspan="3"|1 |
||
| − | **Level 1 - Increase Medal Kickback duration by a short length of time |
||
| + | |- |
||
| − | **Level 2 - The amount of time added is increased |
||
| − | + | |Level 2 - The distance you see Power Weapons is increased |
|
| + | |- |
||
| − | *'''Monkey Man''' |
||
| + | |Level 3 - The distance you see Power Weapons is increased significantly |
||
| − | **''''''Level 1 - Move faster while climbing |
||
| + | |- |
||
| − | **Level 2 - Climb speed is increased |
||
| + | |style="text-align:center;" rowspan="3"|[[Daredevil]] |
||
| − | **Level 3 - Climb speed is increased significantly |
||
| + | |Level 1 - Taunt over an opponent's body to receive ammo |
||
| − | *'''Treasure Hunter''' |
||
| + | |style="text-align:center;" rowspan="3"|[[In Your Face]] |
||
| − | **Level 1 - You have a better chance to receive treasures from chests |
||
| + | |style="text-align:center;" rowspan="3"|1 |
||
| − | **Level 2 - The chance you receive a treasure is increased |
||
| + | |- |
||
| − | **Level 3 - The chance to receive a treasure is increased significantly |
||
| + | |Level 2 - The effects of Level 1 and receive a grenade |
||
| − | *'''Deposit''' |
||
| + | |- |
||
| − | **Level 1 - You receive more money from medals |
||
| − | + | |Level 3 - The effects of Level 2 and receive even more ammo |
|
| + | |- |
||
| − | **Level 3 - The money received is increased significantly |
||
| + | |style="text-align:center;" rowspan="3"|[[Kickback Endurance]] |
||
| − | *'''Back in the Saddle''' |
||
| − | + | |Level 1 - Increase Medal Kickback duration by a short length of time |
|
| + | |style="text-align:center;" rowspan="3"|[[Three Kickback King]] |
||
| − | **Level 2 - Respawn time reduced by 3 seconds. |
||
| + | |style="text-align:center;" rowspan="3"|6 |
||
| − | **Level 3 - Respawn time reduced by 4 seconds. |
||
| + | |- |
||
| − | **UNLOCKED: Level 15. |
||
| + | |Level 2 - The amount of time added is increased |
||
| − | *'''Ammo Award''' |
||
| + | |- |
||
| − | **Level 1 - Receive ammo for every [[Commando]] or [[Gunslinger]] medal you earn. |
||
| − | + | |Level 3 - The amount of time added is increased significantly |
|
| + | |- |
||
| − | **Level 3 - The ammo you receive is increased significantly |
||
| + | |style="text-align:center;" rowspan="3"|[[Monkey Man]] |
||
| − | **UNLOCKED: Level 15. |
||
| + | |Level 1 - Move faster while climbing |
||
| − | *'''Revenge''' |
||
| + | |style="text-align:center;" rowspan="3"|[[Pull Down]] |
||
| − | **Level 1 - Drop live grenade upon death if you are carrying one when you die. |
||
| + | |style="text-align:center;" rowspan="3"|6 |
||
| − | **Level 2 - Always drop a grenade upon death. |
||
| + | |- |
||
| − | **Level 3 - The effects of Level 2, or drop an active Medal Kickback grenade if one is available.<span id="cke_bm_377E" style="display: none; "> </span> |
||
| + | |Level 2 - Climb speed is increased |
||
| − | **UNLOCKED: Level 25. |
||
| + | |- |
||
| − | *'''Bargain''' |
||
| + | |Level 3 - Climb speed is increased significantly |
||
| − | **Level 1 - [[Medal kickbacks|Medal Kickback]] cost by 1. |
||
| + | |- |
||
| − | **Level 2 - Your Medal Kickback will glow gold. |
||
| + | |style="text-align:center;" rowspan="3"|[[Treasure Hunter]] |
||
| − | **Level 3 - Decrease Medal Kickback cost by 2. |
||
| + | |Level 1 - You have a better chance to receive treasures from chests |
||
| − | **UNLOCKED: Level 35. |
||
| + | |style="text-align:center;" rowspan="3"|[[Acquisitions]] |
||
| − | *'''Team Safe''' |
||
| + | |style="text-align:center;" rowspan="3"|10 |
||
| − | **Level 1 - Explosives do not knock you down and teammates only receive 1/2 damage from your explosives. |
||
| + | |- |
||
| − | **Level 2 - Effects of Level 1, but teammates receive no damage from your explosives |
||
| + | |Level 2 - The chance you receive a treasure from kills is increased |
||
| − | **Level 3 - Effects of Levels 1 and 2, and teammates will not be knocked down by your explosives. |
||
| + | |- |
||
| − | **UNLOCKED: Level 45. |
||
| + | |Level 3 - The chance to receive a treasure from anywhere is increased significantly |
||
| − | *'''For My Buddy''' - See the location of the opponent that killed your buddy until they die<ref>http://ca.kotaku.com/5792872/hands-on-with-uncharted-3s-three-team-deathmatch-and-free-for-all-killfests</ref>. Unlocked Level: 20. |
||
| + | |- |
||
| − | *'''Stealth Buddy''' - Fill your Medal Kickback when your buddy gets a stealth kill. Unlocked Level: 30. |
||
| + | |style="text-align:center;" rowspan="3"|[[Deposit]] |
||
| − | *'''Explosive Buddy''' - Get a grenade for each of your buddy's explosive kills. Unlocked Level: 40. |
||
| + | |Level 1 - You receive more money from medals |
||
| + | |style="text-align:center;" rowspan="3"|[[Expansionist]] |
||
| + | |style="text-align:center;" rowspan="3"|10 |
||
| + | |- |
||
| + | |Level 2 - The money received is increased |
||
| + | |- |
||
| + | |Level 3 - The money received is increased significantly |
||
| + | |- |
||
| + | |style="text-align:center;" rowspan="3"|[[Back in the Saddle]] |
||
| + | |Level 1 - Respawn time reduced by 2 seconds |
||
| + | |style="text-align:center;" rowspan="3"|[[Three Medal Pickup]] |
||
| + | |style="text-align:center;" rowspan="3"|15 |
||
| + | |- |
||
| + | |Level 2 - Respawn time reduced by 3 seconds |
||
| + | |- |
||
| + | |Level 3 - Respawn time reduced by 4 seconds |
||
| + | |- |
||
| + | |style="text-align:center;" rowspan="3"|[[Ammo Award]] |
||
| + | |Level 1 - Receive ammo for every [[Commando]] or [[Gunslinger]] medal you earn. |
||
| + | |style="text-align:center;" rowspan="3"|[[Streak]] |
||
| + | |style="text-align:center;" rowspan="3"|15 |
||
| + | |- |
||
| + | |Level 2 - The ammo you receive is increased |
||
| + | |- |
||
| + | |Level 3 - The ammo you receive is increased significantly |
||
| + | |- |
||
| + | |style="text-align:center;" rowspan="3"|[[Revenge]] |
||
| + | |Level 1 - Drop live [[Mk-NDI|grenade]] upon death if you are carrying one when you die |
||
| + | |style="text-align:center;" rowspan="3"|[[Afterlife]] |
||
| + | |style="text-align:center;" rowspan="3"|25 |
||
| + | |- |
||
| + | |Level 2 - Always drop a grenade upon death |
||
| + | |- |
||
| + | |Level 3 - The effects of Level 2, or drop an active Medal Kickback grenade if one is available |
||
| + | |- |
||
| + | |style="text-align:center;" rowspan="3"|[[Bargain]] |
||
| + | |Level 1 - Decrease [[Medal kickbacks|Medal Kickback]] cost by 1 |
||
| + | |style="text-align:center;" rowspan="3"|[[Three Kickback King]] |
||
| + | |style="text-align:center;" rowspan="3"|35 |
||
| + | |- |
||
| + | |Level 2 - Your Medal Kickback will glow gold |
||
| + | |- |
||
| + | |Level 3 - Decrease Medal Kickback cost by 2 |
||
| + | |- |
||
| + | |style="text-align:center;" rowspan="3"|[[Team Safe]] |
||
| + | |Level 1 - Explosives do not knock you down and teammates only receive 1/2 damage from your explosives. |
||
| + | |style="text-align:center;" rowspan="3"|[[High Five]] |
||
| + | |style="text-align:center;" rowspan="3"|45 |
||
| + | |- |
||
| + | |Level 2 - Effects of Level 1, but teammates receive no damage from your explosives |
||
| + | |- |
||
| + | |Level 3 - Effects of Levels 1 and 2, and teammates will not be knocked down by your explosives. |
||
| + | |- |
||
| + | |style="text-align:center;"|'''For My Buddy''' |
||
| + | |See the location of the opponent that killed your buddy until they die |
||
| + | |style="text-align:center;"|N/A |
||
| + | |style="text-align:center;"|20 |
||
| + | |- |
||
| + | |style="text-align:center;"|'''Stealth Buddy''' |
||
| + | |Fill your Medal Kickback when your buddy gets a stealth kill |
||
| + | |style="text-align:center;"|N/A |
||
| + | |style="text-align:center;"|30 |
||
| + | |- |
||
| + | |style="text-align:center;"|'''Explosive Buddy''' |
||
| + | |Get a grenade for each of your buddy's explosive kills |
||
| + | |style="text-align:center;"|N/A |
||
| + | |style="text-align:center;"|40 |
||
| + | |- |
||
| + | |style="text-align:center;"|'''Extra Kickback Cost''' |
||
| + | |Medal kickbacks cost 4 more medals to use. 150% more cash per kill. |
||
| + | |style="text-align:center;"|N/A |
||
| + | |style="text-align:center;"|Legacy 1 |
||
| + | |- |
||
| + | |style="text-align:center;"|'''Small Pockets''' |
||
| + | |You spawn with significantly less ammo. 100% more cash per kill. |
||
| + | |style="text-align:center;"|N/A |
||
| + | |style="text-align:center;"|Legacy 1 |
||
| + | |- |
||
| + | |style="text-align:center;"|'''Invalid''' |
||
| + | |You have half health. 250% more cash per kill. |
||
| + | |style="text-align:center;"|N/A |
||
| + | |style="text-align:center;"|Legacy 2 |
||
| + | |- |
||
| + | |style="text-align:center;"|'''No Power Weapons''' |
||
| + | |You can't pick up power weapons. 200% more cash per kill. |
||
| + | |style="text-align:center;"|N/A |
||
| + | |style="text-align:center;"|Legacy 2 |
||
| + | |} |
||
| − | == |
+ | ====Slot 3==== |
| + | A third booster is granted in competitive if one uses a character skin coupled with both that character's special long gun and pistol: |
||
| − | === Booster Slot 1 === |
||
| + | *[[Nathan Drake|Drake]] - Drake's Skin + Drake's AK + Drake's Para 9 = Explosive Buddy |
||
| + | *[[Sully]] - Sully's Skin + Sully's Dragon + Sully's Arm Micro = For My Buddy |
||
| + | *[[Elena Fisher|Elena]] - Elena's Skin + Elena's G-MAL + Elena's Raffica = Thanks Buddy |
||
| + | *[[Chloe Frazer|Chloe]] - Chloe's Skin + Chloe's M9 + Chloe's Tau = For My Buddy |
||
| + | *[[Katherine Marlowe|Marlowe ]] - Marlowe's Skin + Marlowe's M9 + Marlowe's Para 9 = Sugar Buddy |
||
| + | *[[Talbot]] - Talbot's Skin + Talbot's FAL-SS + Talbot's Arm Micro = Stealth Buddy |
||
| + | *[[Rameses]] - Rameses' Skin + Rameses' KAL-7 + Rameses' Raffica = Booty Buddy |
||
| + | ===Co-op=== |
||
| − | *'''Endurance''' |
||
| + | ====Slot 1==== |
||
| − | **Level 1 - Decrease sprint recovery time |
||
| + | {|class="wikitable" |
||
| − | **Level 2 - The effects of Level 1 with increased sprint duration |
||
| + | !Booster |
||
| − | **Level 3 - Sprint recovery time is decreased further |
||
| + | !Effects |
||
| − | *'''Beast Mode''' |
||
| + | !Upgrade |
||
| − | **Level 1 - Move faster with heavy objects |
||
| + | |- |
||
| − | **Level 2 - The speed you move with heavy objects is increased |
||
| + | |style="text-align:center;" rowspan="3"|'''Endurance''' |
||
| − | **Level 3 - The speed you move with heavy objects is increased significantly |
||
| + | |Level 1 - Decrease sprint recovery time |
||
| − | *'''Scoped In''' |
||
| + | |style="text-align:center;" rowspan="3"|[[Punch Out]] |
||
| − | **Level 1 - Reduce pain wobble while scoped in by 20% |
||
| + | |- |
||
| − | **Level 2 - Reduce pain wobble while scoped in by 50% |
||
| − | + | |Level 2 - The effects of Level 1 with increased sprint duration |
|
| + | |- |
||
| − | *'''Fleet Foot''' |
||
| + | |Level 3 - Sprint recovery time is decreased further |
||
| − | **Level 1 - Move faster while aiming |
||
| + | |- |
||
| − | **Level 2 - Move even Faster while aiming |
||
| + | |style="text-align:center;" rowspan="3"|'''Beast Mode''' |
||
| − | **Level 3 - Speed while aiming is significantly increased. |
||
| + | |Level 1 - Move faster with heavy objects |
||
| − | *'''Regeneration''' |
||
| + | |style="text-align:center;" rowspan="3"|[[Wild West]] |
||
| − | **Level 1 - Recover from wounds faster |
||
| + | |- |
||
| − | **Level 2 - Recovery speed is increased |
||
| − | + | |Level 2 - The speed you move with heavy objects is increased |
|
| + | |- |
||
| − | *'''Explosive Expert''' |
||
| + | |Level 3 - The speed you move with heavy objects is increased significantly |
||
| − | **Level 1 - Start every match with an additional grenade slot |
||
| + | |- |
||
| − | **Level 2 - Level 1, plus gain an extra grenade upon respawn when killed by one |
||
| + | |style="text-align:center;" rowspan="3"|'''Scoped In''' |
||
| − | **Level 3 - Level 1 and 2, plus another additional grenade slot |
||
| + | |Level 1 - Reduce pain wobble while scoped in by 20% |
||
| − | === Booster Slot 2 === |
||
| + | |style="text-align:center;" rowspan="3"|[[Dead Eye]] |
||
| − | *'''Monkey Man''' |
||
| + | |- |
||
| − | **Level 1 - Move faster while climbing |
||
| − | + | |Level 2 - Reduce pain wobble while scoped in by 50% |
|
| + | |- |
||
| − | **Level 3 - Climb speed is increased significantly |
||
| + | |Level 3 - No Pain wobble while scoped in |
||
| − | *'''Kickback Endurance''' |
||
| + | |- |
||
| − | **Level 1 - Increase Medal Kickback duration by a short length of time |
||
| + | |style="text-align:center;" rowspan="3"|'''Fleet Foot''' |
||
| − | **Level 2 - The amount of time added is increased |
||
| + | |Level 1 - Move faster while aiming |
||
| − | **Level 3 - The amount of time added is increased significantly |
||
| + | |style="text-align:center;" rowspan="3"|[[Long Gun Fever]] |
||
| − | *'''Back in the Saddle''' |
||
| + | |- |
||
| − | **Level 1 - Respawn time reduced by 2 seconds |
||
| − | + | |Level 2 - Move even Faster while aiming |
|
| + | |- |
||
| − | **Level 3 - Respawn time reduced by 6 seconds |
||
| + | |Level 3 - Speed while aiming is significantly increased. |
||
| − | *'''Overstock''' |
||
| + | |- |
||
| − | **Level 1 - Medal Kickback limit increased by 3 |
||
| + | |style="text-align:center;" rowspan="3"|'''Regeneration''' |
||
| − | **Level 2 - Medal Kickback limit increased by 4 |
||
| + | |Level 1 - Recover from wounds faster |
||
| − | **Level 3 - Medal Kickback limit increased by 6 |
||
| + | |style="text-align:center;" rowspan="3"|[[Medic]] |
||
| − | *'''Bargain''' |
||
| + | |- |
||
| − | **Level 1 - Decrease [[Medal kickbacks|Medal Kickback]] cost by 1 |
||
| + | |Level 2 - Recovery speed is increased |
||
| − | **Level 2 - The effects of Level 1 and always show the color gold when activating a kickback |
||
| + | |- |
||
| − | **Level 3 - The decrease in Medal Kickback costs is changed to 2 |
||
| + | |Level 3 - Recovery speed is increased significantly |
||
| − | *'''Team Safe''' |
||
| + | |- |
||
| − | **Level 1 - Explosives do not knock you down and teammates only receive half damage from your explosives |
||
| + | |style="text-align:center;" rowspan="3"|'''Explosive Expert''' |
||
| − | **Level 2 - Level 1, except teammates do not recieve damage from your explosives |
||
| + | |Level 1 - Start every match with an additional grenade slot |
||
| − | **Level 3 - Level 1 and 2, and teammates do not get knocked down from your explosives |
||
| + | |style="text-align:center;" rowspan="3"|Mad Bomber |
||
| − | *'''Ammo Award''' |
||
| + | |- |
||
| − | **Level 1 - Receive additional ammo for evey Long Gun Fever or Wild West medal you get |
||
| + | |Level 2 - The effects of Level 1, and spawn with an additional grenade when killed by one |
||
| − | **Level 2 - The ammo you receive is increased |
||
| + | |- |
||
| − | **Level 3 - The ammo you receive is increased significantly |
||
| + | |Level 3 - The effects of Level 2, and another additional grenade slot |
||
| + | |} |
||
| − | == |
+ | ====Slot 2==== |
| + | {|class="wikitable" |
||
| − | {{Reflist}} |
||
| + | !Booster |
||
| + | !Effects |
||
| + | !Upgrade |
||
| + | |- |
||
| + | |style="text-align:center;" rowspan="3"|'''Monkey Man''' |
||
| + | |Level 1 - Move faster while climbing |
||
| + | |style="text-align:center;" rowspan="3"|[[Tricky Boy]] |
||
| + | |- |
||
| + | |Level 2 - Climb speed is increased |
||
| + | |- |
||
| + | |Level 3 - Climb speed is increased significantly |
||
| + | |- |
||
| + | |style="text-align:center;" rowspan="3"|'''Kickback Endurance''' |
||
| + | |Level 1 - Increase Medal Kickback duration by a short length of time |
||
| + | |style="text-align:center;" rowspan="3"|[[Hot Potato]] |
||
| + | |- |
||
| + | |Level 2 - The amount of time added is increased |
||
| + | |- |
||
| + | |Level 3 - The amount of time added is increased significantly |
||
| + | |- |
||
| + | |style="text-align:center;" rowspan="3"|'''Back in the Saddle''' |
||
| + | |Level 1 - Respawn time reduced by 2 seconds |
||
| + | |style="text-align:center;" rowspan="3"|[[If It Bleeds...]] |
||
| + | |- |
||
| + | |Level 2 - Respawn time reduced by 4 seconds |
||
| + | |- |
||
| + | |Level 3 - Respawn time reduced by 6 seconds |
||
| + | |- |
||
| + | |style="text-align:center;" rowspan="3"|'''Overstock''' |
||
| + | |Level 1 - Medal Kickback limit increased by 3 |
||
| + | |style="text-align:center;" rowspan="3"|[[Covert Ops]] |
||
| + | |- |
||
| + | |Level 2 - Medal Kickback limit increased by 4 |
||
| + | |- |
||
| + | |Level 3 - Medal Kickback limit increased by 6 |
||
| + | |- |
||
| + | |style="text-align:center;" rowspan="3"|'''Bargain''' |
||
| + | |Level 1 - Decrease [[Medal kickbacks|Medal Kickback]] cost by 1 |
||
| + | |style="text-align:center;" rowspan="3"|In The Soft Spot |
||
| + | |- |
||
| + | |Level 2 - The effects of Level 1 and your Medal Kickback will glow gold |
||
| + | |- |
||
| + | |Level 3 - Decrease Medal Kickback cost by 2 |
||
| + | |- |
||
| + | |style="text-align:center;" rowspan="3"|'''Team Safe''' |
||
| + | |Level 1 - Explosives do not knock you down and teammates only receive half damage from your explosives |
||
| + | |style="text-align:center;" rowspan="3"|[[Let 'Em Go]] |
||
| + | |- |
||
| + | |Level 2 - The effects of Level 1, and teammates do not receive damage from your explosives |
||
| + | |- |
||
| + | |Level 3 - The effects of Level 2, and teammates do not get knocked down from your explosives |
||
| + | |- |
||
| + | |style="text-align:center;" rowspan="3"|'''Ammo Award''' |
||
| + | |Level 1 - Receive ammo for every Long Gun Fever or Wild West medal you get |
||
| + | |style="text-align:center;" rowspan="3"|[[Head Cracker]] |
||
| + | |- |
||
| + | |Level 2 - The ammo you receive is increased |
||
| + | |- |
||
| + | |Level 3 - The ammo you receive is increased significantly |
||
| + | |} |
||
[[Category:Uncharted 3]] |
[[Category:Uncharted 3]] |
||
[[Category:Uncharted 3 multiplayer]] |
[[Category:Uncharted 3 multiplayer]] |
||
Revision as of 01:22, 14 October 2013
Boosters are a means of gaining an advantage in the multiplayer mode of Uncharted 3: Drake's Deception.
Overview
The booster system has changed slightly from the booster system in Uncharted 2: Among Thieves. This time around, the effect of boosters will change with which rank the booster is at. The more a booster is used, the more it will rank up. The higher its rank, the greater its reward. For every booster there are three levels that can be unlocked through earning the corresponding medals that go along with it.
List of boosters
Competitive
Slot 1
| Booster | Effects | Upgrade | Rank |
|---|---|---|---|
Come Here |
Level 1 - See the enemy that killed you if they're within a short distance until they die | Retaliation | 1 |
| Level 2 - The distance you can see your opponent is increased | |||
| Level 3 - The distance you can see your opponent is increased significantly | |||
Endurance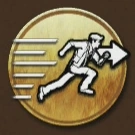 |
Level 1 - Decrease sprint recovery time | Sunday Stroll/Marathon Runner | 1 |
| Level 2 - The effects of Level 1 with increased sprint duration | |||
| Level 3 - Sprint recovery time is decreased further | |||
| Beast Mode |
Level 1 - Move faster with heavy objects | Captured | 6 |
| Level 2 - The speed you move with heavy objects is increased | |||
| Level 3 - The speed you move with heavy objects is increased significantly | |||
Let Me See |
Level 1 - After two or more deaths with no kills you see all opponents for a short time | Avenger | 6 |
| Level 2 - The duration for which you see opponents is increased | |||
| Level 3 - The duration for which you see opponents is increased significantly | |||
Scoped In |
Level 1 - Reduced pain wobble while scoped in | The Long Ranger | 10 |
| Level 2 - Pain wobble is reduced further | |||
| Level 3 - No pain wobble while scoped in | |||
Cloaked |
Level 1 - Opponents will not see your player arrow and you are difficult to hear | Assassin | 10 |
| Level 2 - You become even more difficult to hear. | |||
| Level 3 - You make no sound while moving and also become immune to Disruption | |||
Regeneration |
Level 1 - Recover from wounds faster | Lucky... | 15 |
| Level 2 - Recovery speed is increased | |||
| Level 3 - Recovery speed is increased significantly | |||
Fleet Foot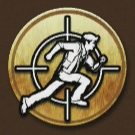 |
Level 1 - Move faster while aiming | Commando | 15 |
| Level 2 - The speed you move while aiming is increased | |||
| Level 3 - The speed you move while aiming is increased significantly | |||
Explosive Shell Expert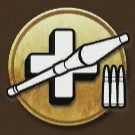 |
Level 1 - Any M32-Hammer you use comes with one extra round. | Fire In The Hole | 25 |
| Level 2 - Any RPG-7 & M32-Hammer you use comes with one extra round. | |||
| Level 3 - The amount of additional M32-Hammer ammo increased to 2. | |||
Explosive Expert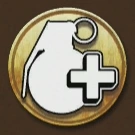 |
Level 1 - Start every match with an additional grenade slot | Frag 'Em | 35 |
| Level 2 - The effects of Level 1 and spawn with an additional grenade when killed with one | |||
| Level 3 - Start every match with two extra grenade slots and spawn with an additional grenade when killed by one. | |||
Weapon Expert |
Level 1 - Add one additional MOD slot to all pistols. | Gunslinger/Triple Threat | 45 |
| Level 2 - Effects of Level 1 and switching between sidearm and long gun is Faster | |||
| Level 3 - Effects of Levels 1 and 2 as well as one additional MOD slot to long guns. | |||
| Sugar Buddy | Receive a quarter of the cash your buddy earns | N/A | 20 |
| Booty Buddy | Get rewards from chests when your buddy does | N/A | 30 |
| Thanks Buddy | Get a medal for every 3 your buddy earns | N/A | 40 |
| Out of Breath | Sprint recovery time and duration is slower. 100% more cash per kill | N/A | Legacy 1 |
| Flat Footed | Move significantly slower while aiming. 150% more cash per kill | N/A | Legacy 1 |
| Slow Healing | Health regeneration is significantly slowed. 100% more cash per kill | N/A | Legacy 2 |
| Fewer Grenades | Ability to carry grenades is reduced. 200% more cash per kill | N/A | Legacy 2 |
Slot 2
| Booster | Effects | Upgrade | Rank |
|---|---|---|---|
| Power Hunter | Level 1 - See the location of Power Weapons within a short distance | Power Killer | 1 |
| Level 2 - The distance you see Power Weapons is increased | |||
| Level 3 - The distance you see Power Weapons is increased significantly | |||
| Daredevil | Level 1 - Taunt over an opponent's body to receive ammo | In Your Face | 1 |
| Level 2 - The effects of Level 1 and receive a grenade | |||
| Level 3 - The effects of Level 2 and receive even more ammo | |||
| Kickback Endurance | Level 1 - Increase Medal Kickback duration by a short length of time | Three Kickback King | 6 |
| Level 2 - The amount of time added is increased | |||
| Level 3 - The amount of time added is increased significantly | |||
| Monkey Man | Level 1 - Move faster while climbing | Pull Down | 6 |
| Level 2 - Climb speed is increased | |||
| Level 3 - Climb speed is increased significantly | |||
| Treasure Hunter | Level 1 - You have a better chance to receive treasures from chests | Acquisitions | 10 |
| Level 2 - The chance you receive a treasure from kills is increased | |||
| Level 3 - The chance to receive a treasure from anywhere is increased significantly | |||
| Deposit | Level 1 - You receive more money from medals | Expansionist | 10 |
| Level 2 - The money received is increased | |||
| Level 3 - The money received is increased significantly | |||
| Back in the Saddle | Level 1 - Respawn time reduced by 2 seconds | Three Medal Pickup | 15 |
| Level 2 - Respawn time reduced by 3 seconds | |||
| Level 3 - Respawn time reduced by 4 seconds | |||
| Ammo Award | Level 1 - Receive ammo for every Commando or Gunslinger medal you earn. | Streak | 15 |
| Level 2 - The ammo you receive is increased | |||
| Level 3 - The ammo you receive is increased significantly | |||
| Revenge | Level 1 - Drop live grenade upon death if you are carrying one when you die | Afterlife | 25 |
| Level 2 - Always drop a grenade upon death | |||
| Level 3 - The effects of Level 2, or drop an active Medal Kickback grenade if one is available | |||
| Bargain | Level 1 - Decrease Medal Kickback cost by 1 | Three Kickback King | 35 |
| Level 2 - Your Medal Kickback will glow gold | |||
| Level 3 - Decrease Medal Kickback cost by 2 | |||
| Team Safe | Level 1 - Explosives do not knock you down and teammates only receive 1/2 damage from your explosives. | High Five | 45 |
| Level 2 - Effects of Level 1, but teammates receive no damage from your explosives | |||
| Level 3 - Effects of Levels 1 and 2, and teammates will not be knocked down by your explosives. | |||
| For My Buddy | See the location of the opponent that killed your buddy until they die | N/A | 20 |
| Stealth Buddy | Fill your Medal Kickback when your buddy gets a stealth kill | N/A | 30 |
| Explosive Buddy | Get a grenade for each of your buddy's explosive kills | N/A | 40 |
| Extra Kickback Cost | Medal kickbacks cost 4 more medals to use. 150% more cash per kill. | N/A | Legacy 1 |
| Small Pockets | You spawn with significantly less ammo. 100% more cash per kill. | N/A | Legacy 1 |
| Invalid | You have half health. 250% more cash per kill. | N/A | Legacy 2 |
| No Power Weapons | You can't pick up power weapons. 200% more cash per kill. | N/A | Legacy 2 |
Slot 3
A third booster is granted in competitive if one uses a character skin coupled with both that character's special long gun and pistol:
- Drake - Drake's Skin + Drake's AK + Drake's Para 9 = Explosive Buddy
- Sully - Sully's Skin + Sully's Dragon + Sully's Arm Micro = For My Buddy
- Elena - Elena's Skin + Elena's G-MAL + Elena's Raffica = Thanks Buddy
- Chloe - Chloe's Skin + Chloe's M9 + Chloe's Tau = For My Buddy
- Marlowe - Marlowe's Skin + Marlowe's M9 + Marlowe's Para 9 = Sugar Buddy
- Talbot - Talbot's Skin + Talbot's FAL-SS + Talbot's Arm Micro = Stealth Buddy
- Rameses - Rameses' Skin + Rameses' KAL-7 + Rameses' Raffica = Booty Buddy
Co-op
Slot 1
| Booster | Effects | Upgrade |
|---|---|---|
| Endurance | Level 1 - Decrease sprint recovery time | Punch Out |
| Level 2 - The effects of Level 1 with increased sprint duration | ||
| Level 3 - Sprint recovery time is decreased further | ||
| Beast Mode | Level 1 - Move faster with heavy objects | Wild West |
| Level 2 - The speed you move with heavy objects is increased | ||
| Level 3 - The speed you move with heavy objects is increased significantly | ||
| Scoped In | Level 1 - Reduce pain wobble while scoped in by 20% | Dead Eye |
| Level 2 - Reduce pain wobble while scoped in by 50% | ||
| Level 3 - No Pain wobble while scoped in | ||
| Fleet Foot | Level 1 - Move faster while aiming | Long Gun Fever |
| Level 2 - Move even Faster while aiming | ||
| Level 3 - Speed while aiming is significantly increased. | ||
| Regeneration | Level 1 - Recover from wounds faster | Medic |
| Level 2 - Recovery speed is increased | ||
| Level 3 - Recovery speed is increased significantly | ||
| Explosive Expert | Level 1 - Start every match with an additional grenade slot | Mad Bomber |
| Level 2 - The effects of Level 1, and spawn with an additional grenade when killed by one | ||
| Level 3 - The effects of Level 2, and another additional grenade slot |
Slot 2
| Booster | Effects | Upgrade |
|---|---|---|
| Monkey Man | Level 1 - Move faster while climbing | Tricky Boy |
| Level 2 - Climb speed is increased | ||
| Level 3 - Climb speed is increased significantly | ||
| Kickback Endurance | Level 1 - Increase Medal Kickback duration by a short length of time | Hot Potato |
| Level 2 - The amount of time added is increased | ||
| Level 3 - The amount of time added is increased significantly | ||
| Back in the Saddle | Level 1 - Respawn time reduced by 2 seconds | If It Bleeds... |
| Level 2 - Respawn time reduced by 4 seconds | ||
| Level 3 - Respawn time reduced by 6 seconds | ||
| Overstock | Level 1 - Medal Kickback limit increased by 3 | Covert Ops |
| Level 2 - Medal Kickback limit increased by 4 | ||
| Level 3 - Medal Kickback limit increased by 6 | ||
| Bargain | Level 1 - Decrease Medal Kickback cost by 1 | In The Soft Spot |
| Level 2 - The effects of Level 1 and your Medal Kickback will glow gold | ||
| Level 3 - Decrease Medal Kickback cost by 2 | ||
| Team Safe | Level 1 - Explosives do not knock you down and teammates only receive half damage from your explosives | Let 'Em Go |
| Level 2 - The effects of Level 1, and teammates do not receive damage from your explosives | ||
| Level 3 - The effects of Level 2, and teammates do not get knocked down from your explosives | ||
| Ammo Award | Level 1 - Receive ammo for every Long Gun Fever or Wild West medal you get | Head Cracker |
| Level 2 - The ammo you receive is increased | ||
| Level 3 - The ammo you receive is increased significantly |